A tutorial to make a papercraft initial(s). Of course you can spell whole names with it, but I suggest (strongly) to start with one letter en work you’re way up to you initials.
In this tutorial you don’t have to spend any money except for the paper you print it on.
It’s written for windows (sorry Apple users)
Shortcut to:
Programs | What are we going to build? | Step 1 | Step 2 | Step 3 | Step 4
Programs
For this tutorial you need a couple of programs, which are for free to get from the internet:
 Pepakura designer v2 .1.2 – program that creates flat versions of a 3d model
![]() Google SketchUp 6 – very simple 3d modeler
Google SketchUp 6 – very simple 3d modeler
Optional (I will explane this later): PDFCreator – creates PDFs from any Windows program
To name a view: Blender, Wings 3D, Metasequoia and there are probably a lot more.
The only reason I choose for Google SketchUp because I got it to work in a couple of minutes…
Google SketchUp is freeware, PDFCreator is open source (free) and Pepakura designer is shareware.
So the only limitation you have is Pepakura designer: in the version you can download and try out, it’s not possible to “Save” and “Export”. But I found that it’s possible to print, so a legal way to export what you have build in Pepakura is PDF.
This has of course some limitations, and the biggest one is you are not able to save you changes (which you can unlock for a lousy US$38).
What are we going to build?
![]()
Lets make a text logo and I really want to use the logo I made a while back, but I realize that’s not for everybody….So lets make a logo out of freeware fonts, and find a font suitable for what I want.
I want to make a 3d version of mck and because I know how difficult it is to create round corners (“c”) I am looking for a bold/stong blocky font .
We could make a complete text logo, but when I started writing this tutorial I found out that with more then one letter, it started to be quite complex. Which is not bad, but quite difficult to point out how things work. So for this tutorial I will explain just one letter and we will make it 3d.
Step1: download and install
Except the programs discussed above (Pepakura designer v2.1.2, Google SketchUp 6 and PDFCreator) you also have to choose a nice font to create your initial/character in.
So lets search a nice letter with a nice “M” or “m” (or whatever letter you want).
For example a couple of font of dafont.com/:
Cowboys – big/strong and very little curves
Kroftsmann – big / strong and no curves
Aerojones nf – big / strong and round courners
But make this tutorial even easier I have chosen for a pixel-font from 04.jp.org named 04b-19.
![]()
Download the font(s) you want to use, and copy it in:
C:\WINDOWS\Fonts
Step 2: Modeling in 3d
This is easier then it sounds so lets do it in little steps:
| 1. |  |
Start Google Sketchup You will see a little dude just standing there, forget him. He is there just for the scale purposes and will not be seen in your end result. |
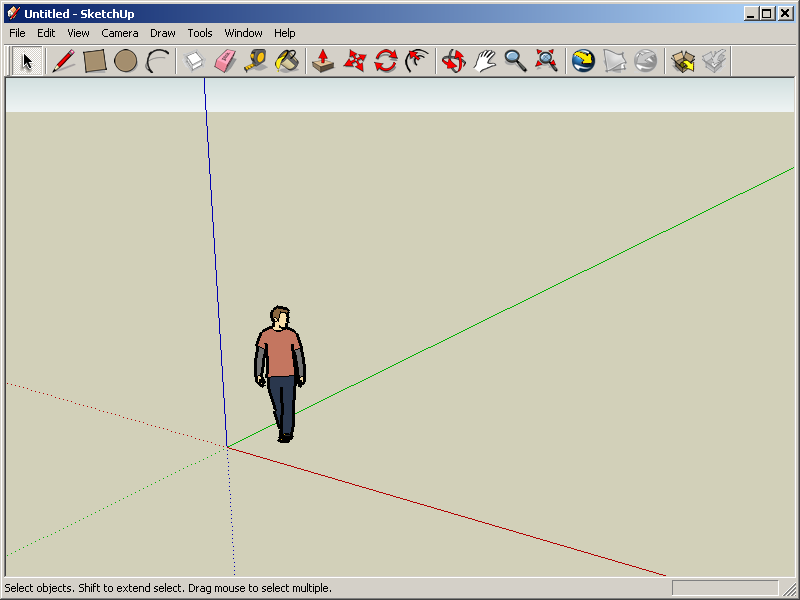
| 2. | ![Google Sketchup - Tools > 3d Text’ /></td>
<td>Goto: <a href="http://www.matthijskamstra.nl/blog/wp-content/uploads/googlesketchup_02.png" rel="flashbox[papercraftcharacter]" title="Google Sketchup - goto Tools - 3d Text">Tools – 3d Text</a></td>
</tr>
<tr>
<td>3.</td>
<td><img src=](http://www.matthijskamstra.nl/blog/wp-content/uploads/googlesketchup_02.thumbnail.png) |
Find your font and change the Height and Extruded (when I doubt: try to follow the picture) |
| 4. | 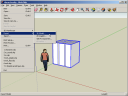 |
Press on place and place the character. |
| 5. | |
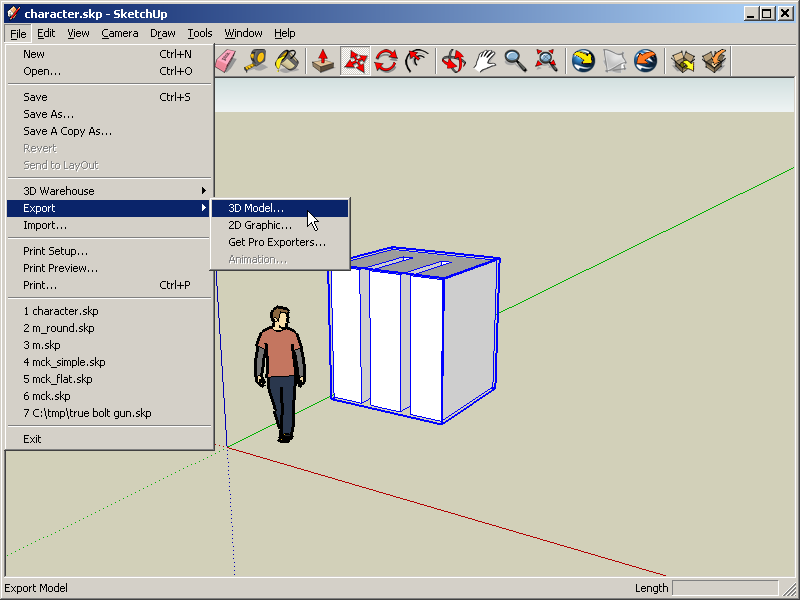
That’s all to it. Now save your file: for example “character.skp” and export to character.kmz (google earth 4) Pepakura Designer can open .KMZ files but they have to be google earth 4! |
Step 3: create papercraft
It’s too easy will the get difficult? No!
| 1. |  |
If you’ve done what I asked, you have Pepakura installed (and if not, now is the time). Open Pepakura |
| 2. | 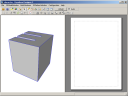 |
Open the character.kmz file you just saved on you’re hard drive |
| 3. | 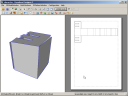 |
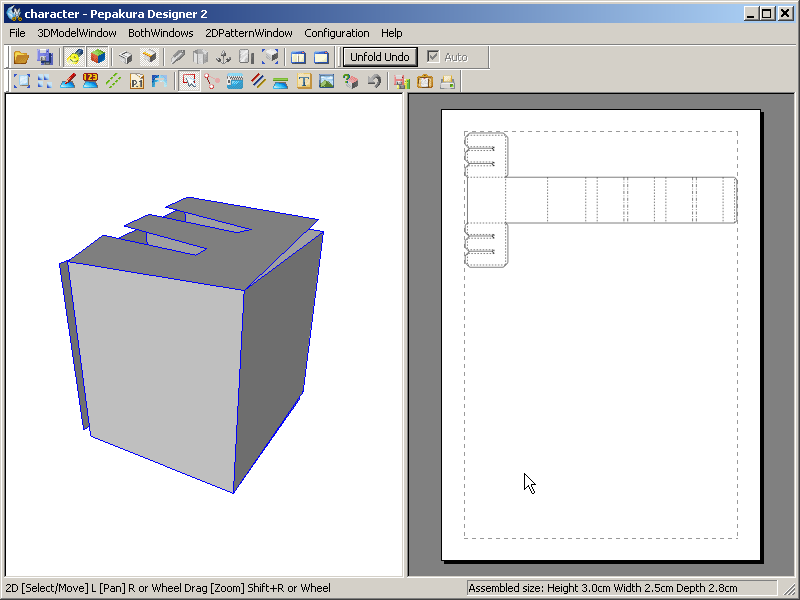
Oke lets see what Pepakura does with this simple example: press “unfold’ Yep, it’s that easy! |
| 3a. | 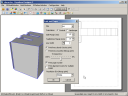 |
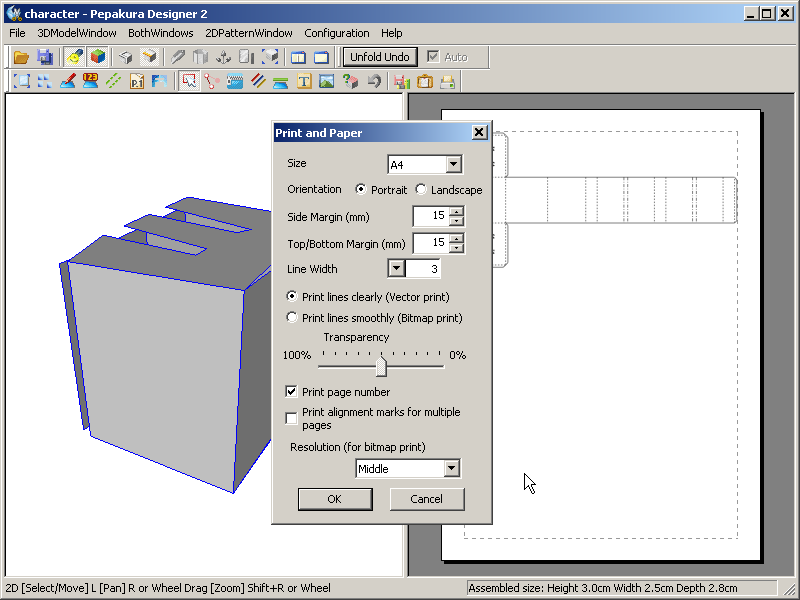
Make sure that you change the default print setting, this will improve the quality of your print and makes it possible to import in Illustrator. Papakura – Print and Paperconfiguration |
| 4. |
 |
Start you’re printer….. jadajada, you know what to do: Press file – print (prepare to export to PDF read this) |
Step 4: start building
Grab you’re glue and scissors and start building.
Export
This is for people who want to “export” the papermodel/papercraft to a file and modify it in a vector program like Illustrator. (Perhaps Inkscape will work too, but I don’t have that installed)
Instead of printing the model to paper, you can print it to .PDF. And this file is easy to import in Illustrator.
The only thing that you have to do is install: PDFCreator.
This program is opensource (doesn’t cost anything) and works the same as your printer.
Instead of printing to a printer, which is connected to you computer or network, you print to PDFCreator. And this will create a PDF for you on you’re computer.
42 replies on “How to create your own Papercraft”
Here’s another great one-app cross-platform and FREE option… Blender!
You can create, unwrap your model right in blender. You can even do some basic graphic work right on your model surface inside Blender. The result can be imported into any image editor for further editing of your graphics. Glue tabs are not added automatically, but you can manually add them either as part of your 3D model or free-handed via pen or pencil after you print your model.
Blender is a very good option. It’s free and cross-platform.
And I didn’t know about a function which would ‘unfold’ your 3d-design.
But the only thing that I dislike about Blender is the
complex and quite intimidating, interface.
Which makes it quite difficult for beginners (which I am) to start with Blender. Perhaps after I done some work with a less intimidating program like Google Sketchup or Wings 3D.
This is absolutly great!!! I can’t wait to try it and build my own toys/models. Your my hero!
[…] was experimenting with Google SketchUp 6 and Pepakura designer v2 .1.2. And I saw in the Pepakura a pattern when […]
Here’s an unfolding plug-in that lives inside Google Sketchup. It’s called Waybe and it’s currently being beta tested at http://waybe.weebly.com
How do you color your papercraft model in Pepakura Designer?
I’m sorry, can’t help you with this question.
Although I created this tutorial, I’m not a 3D specialist or very good with Pepakura.
🙁
To be honest, I’ve only created this tutorial to see if it’s possible to make papercraft with free available software.
You could try your question at the forum of http://www.nicepapertoys.com/, I know Jerom is very handy with Pepakura.
[…] recently he started a experiment with Google Sketchup and Pepakura (read my tutorial about creating papermodels with these 2) which are very […]
It’s alright.
Thanks for the feedback and the link, I’ll try it. 🙂
I have a problem !!! when i go to seve my proyect in pepakura i can t becouse the program need a password ??? can you help me ???
I can be short about that: no!
Pepakura is currently the only program that you can use to create papertoys/papercraft for 3d models. Pepakura is shareware what means that you can try the program with all its features, but some key elements of the program are disabled. In this case saving.
My tutorial doesn’t hack Pepakura, but uses the fact that you can print the Pepakura files and that you can export it that way to pdf.
If you want to save your files, you should buy the program (US $38).
(or spend some time finding a serial, or crack 😉 )
But just you know, I don’t have a password either, I use the export as described in the tutorial.
What a genius idea! 🙂 I’m gonna have a ton of fun with this 🙂 Thanks, and well done!
dude thats so cool now i can do stuff with
out serching on google
I can’t save the 3d model I made in google earth 4. Can you please help me. I have google sketchup 7
I’m sorry, but are you sure you didn’t install sketchup pro?
Otherwise I can only say: file >> save
Wow! It’s cool!
[…] Paper-y Dominatrix 2009 April 20 tags: geekery, hobbies, papercraft, urban paper by Lola Batling My life is apparently all about paper. I write on it and I’ve folded it. Now, I’m going in a new direction. Papercraft! I’m so glad I’ve finally kinda got a hobby! great tutorial btw […]
[…] of my most popular post is about how to create papertoys (How to create your own papercraft). It seems that a lot of people are interested in papertoys and how to make themselves. On Nice […]
[…] of my most popular post is about how to create papertoys (How to create your own papercraft). It seems that a lot of people are interested in papertoys and how to make themselves. But there […]
[…] Matthijs C. Kamstra aka [mck] wrote an interesting article regarding this subject: How to create your own Papercraft […]
SketchUp 7 does not have the option of exporting or saving to Google Earth 4 specifically, just Google Earth(kmz). I will try version 6.
Yes that is correct.
Recently I tried to make a papertoy using Sketchup and Pepakura. Because Sketchup asked to be updated I did that (upgraded to SketchUp 7) and the files generated by that version can’t be imported in Pepakura.
Because I was working on Windows I could easily find an old Sketchup version, I can’t remember if I started to build from scratch again or imported the file made by Sketchup 7 (but if I had to guess I think it’s not possible to import Sketchup 7 files in Sketchup 6)
For some strange reason it’s not that simple to find a old Sketchup for Mac
thnx for the info but i have one question
when i open my “crestion” in pepakura
all the faces are doublesided
in other words when i unvold it there are 2 faces for one side inside and outside.
what do i need to do to fix it?
ps: i used sketchup
pss: are you dutch?
cuz i am and your name is very dutch.
when i want to open an kmz. file it says “cannot read this file format please save in google earth 4 format”
what do i need to do?
The new version of Google Sketchup doesn’t save the files in a way pepakura can open it.
Try an older version of Google Sketchup
Jazeker!!
OK.. soo… Is there any option out there for someone working on a mac? I’ve been seeing all these amazing creations and want to get into it . Any Help?
No there is no option to do this on a Mac.
You could try to install Windows on your mac (BootCamp / Parallels) but that’s probably not the answer you are looking for.
🙁
Hi, i tried your tutorial and did what you said, but when i try to open my KMZ file, pepakura said “can’t read this file format. Please save in Google Earth 4 format”. Exactly how do i do that???
I recognize this problem.
It has to do with the version of Sketchup.
You are using the newest version (Sketchup 7) and for some reason Pepakura can’t read those files.
Try to download an older version (Sketchup 6)
yeah am succes!!!
with GSU 6 and pepakura desaign 2
we must download lates program
i have a better idea,make anithing model and export his UV map of all the textures as a picture and make it as the uv map =P
Hey! Google sketchup 8 has an option to export as .dae! It is a common 3d file type so blender and pepakura can open it!
thanks for tip on the conversion! have a nice day 😉
hi, I can’t find any way to add the 3D text into google sketch up. Can you help me please?
k so. i’m having a bit of difficulty, im typed a name as the 3d graphic saved it as a KMC file. but in pepakura it says it has to cut off verticies and stuff and it shows all weird and when unfolded its like, very messed up. please help, thank you.
Hi.
How can I made a big model,for example a house, and divide the whole into smaller parts.
This
______________
| |
| |
| |
—————
in this
______ ______
| |\ /| |
| || || |
| || || |
——-/ \——
yes, this is strange 😀
Hi,
How can I divided into two parts one wall, because this is wide and in the paper is a small part.
Thanks
si van hacer un tutorial, muestren elementos mas complejos, siempre muestran los modelos mas faciles y los dificiles nadie muestra como se hace y dicen k es la misma wea. esto es una porqueria.
I very happy with any comment on my blog, good or bad.
But I have to stress that this is a english blog.
And I don’t understand Spanish so I have to translate it:
And if that is the correct translation: correct it is a simple tutorial.
When I wrote it, it was just a test to see if it was possible.
I create my papertoys with Illustrator so I don’t use a 3D program to make paper-models.
But if I remember correctly: you can always make something complex and let pepakura flatten that for you.
As I mentioned before in the comments, I can’t advice you on that because I really don’t know.
This is strange, I don’t have either one of the downloading thingies download. How do you make a papercraft without the downloading thingies?